comment 1

Jammin

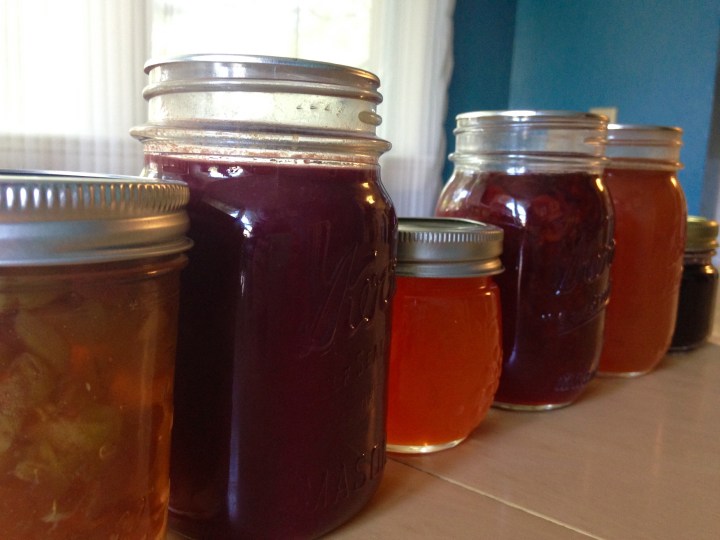
And we hope you like jammin too.

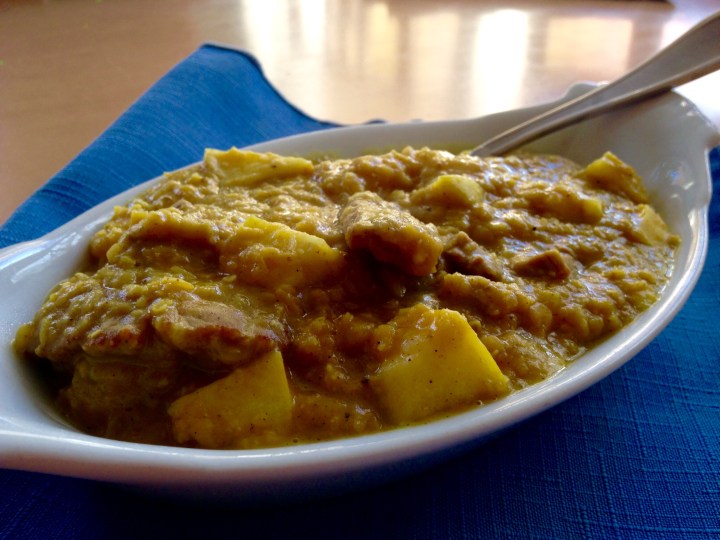
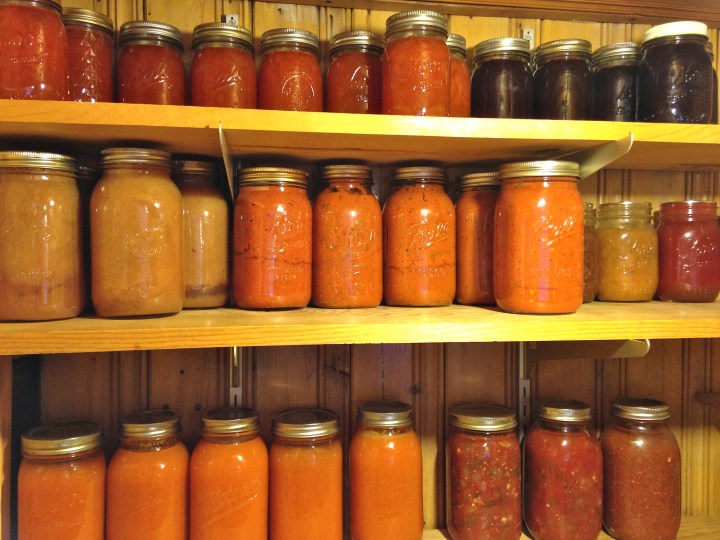
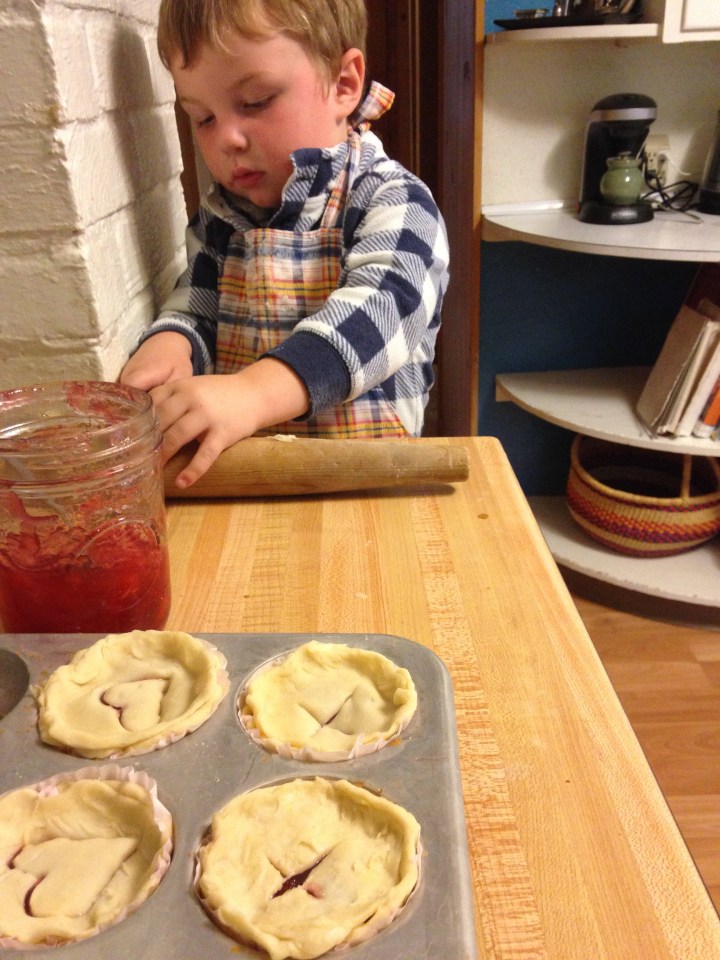
Think beyond morning toast.  The underestimated jam deserves far more attention.  Think about mid-winter meat glazes of peach or plum.  Consider as filling for the perfect layered cake–cherry jam has become our birthday cake filling favorite, with apricot a close runner-up.  Spike your morning smoothie or yogurt parfait, bake sheets of fruit bars, and have every flavor for pb and j covered for the year’s lunches–all this with jam.

IMG_2159

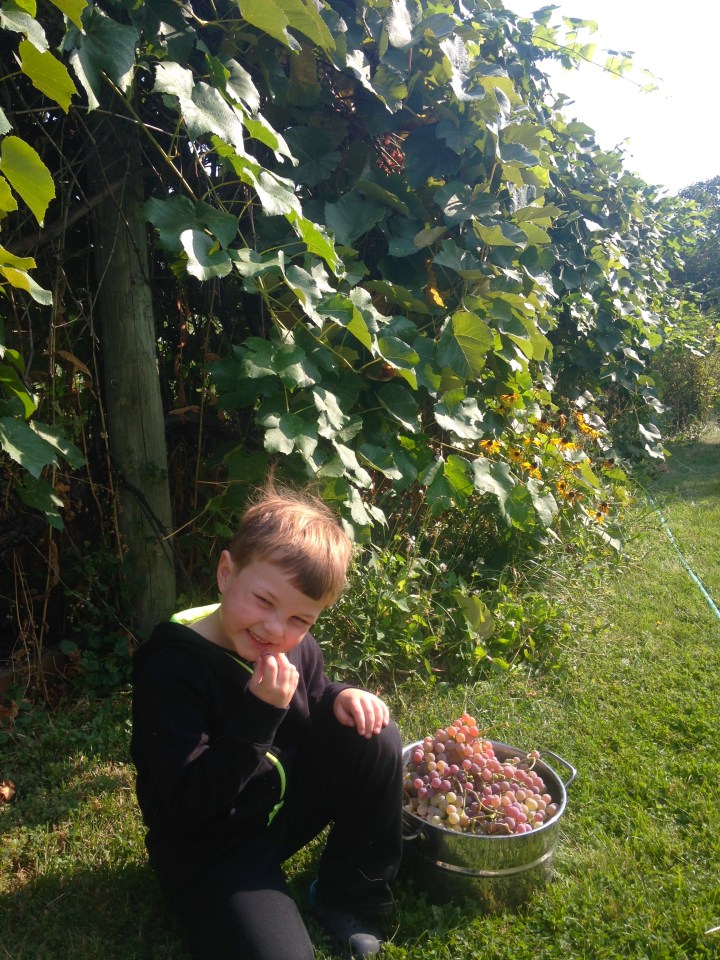
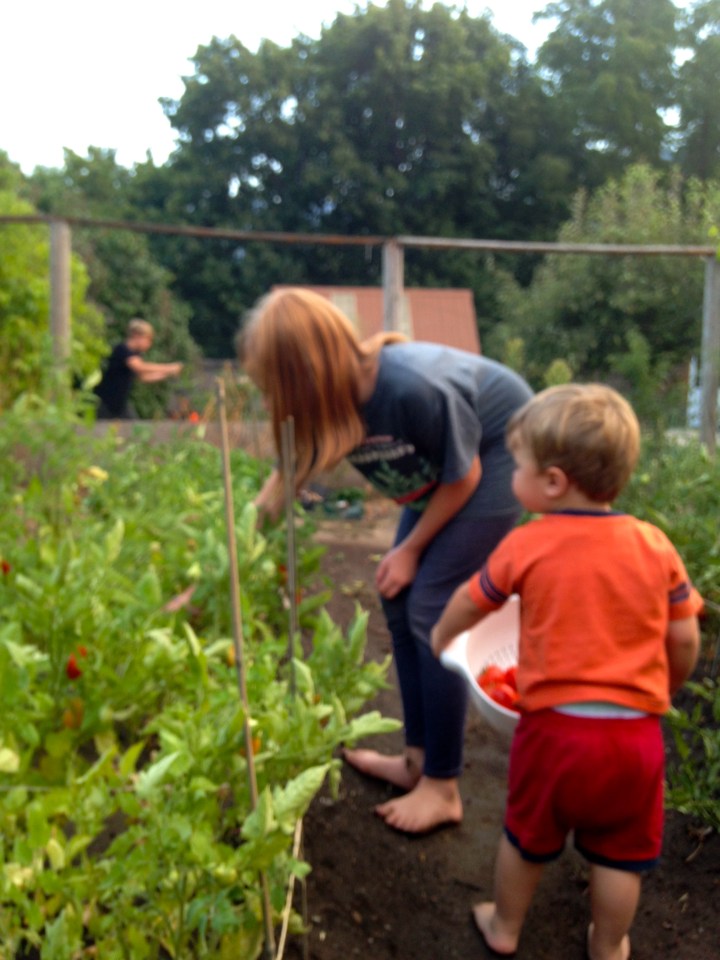
Jam has been historically a most excellent preservation of most fruit for millennia.  There’s a scene of outdoor jam cooking over an open fire on a farm in Tolstoy’s Anna Karinina that is both romantic and realistic.  All the women of Levin’s farm from head mistress to youngest girl take turns stirring, patiently stirring, the fruit of summer’s end over flames.  It is a beautiful, annual tradition of the harvest.

Yellow plums

IMG_4661

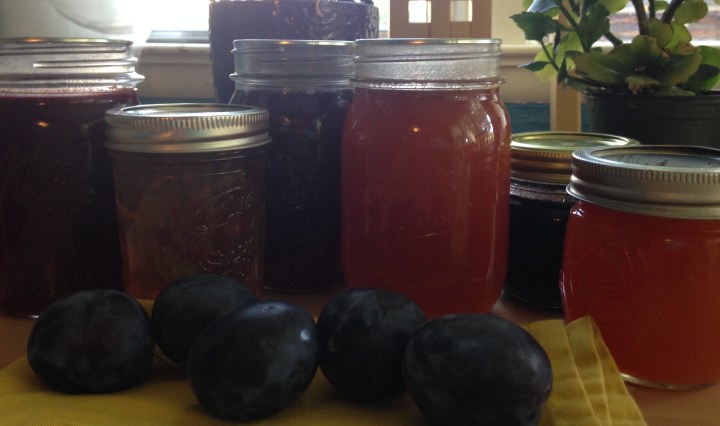
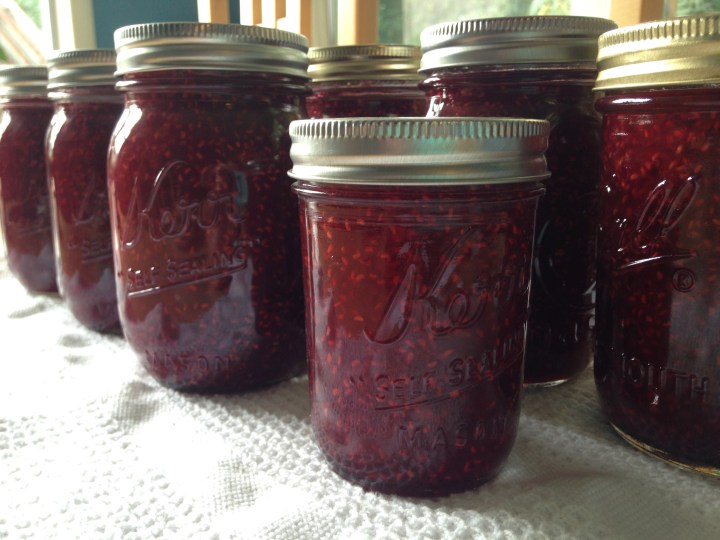
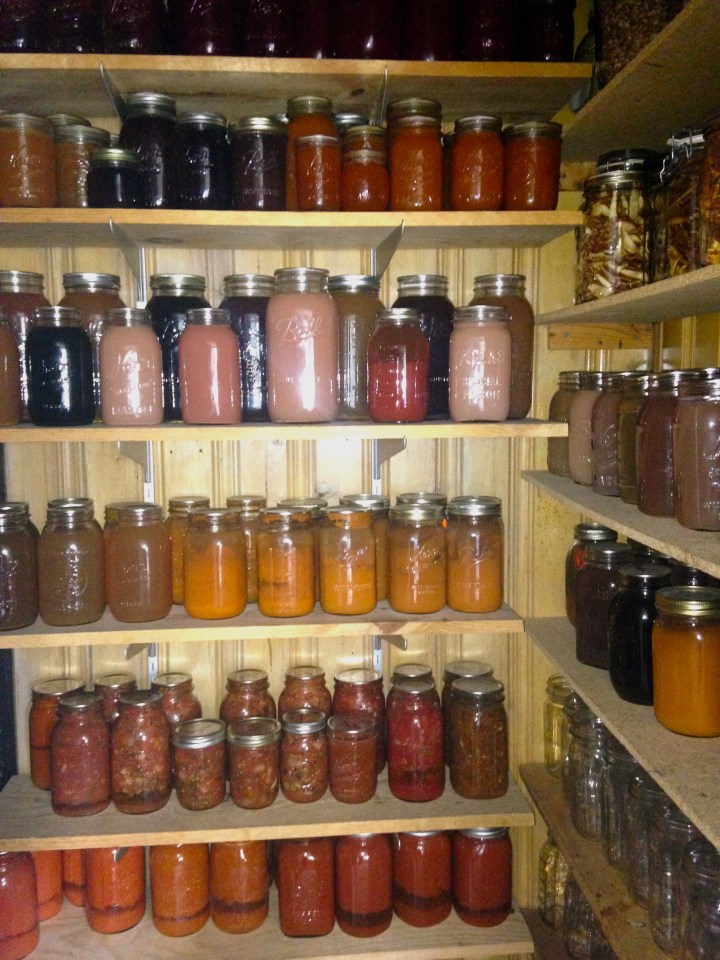
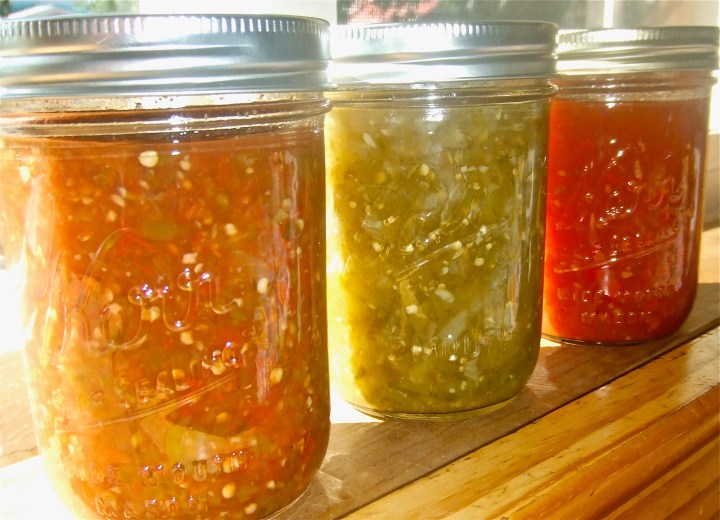
The process of preserving jam is today made easier by using pectin, but the process is  doable without pectin, though takes far longer, stirring and scraping at a full boil until the congealing sugars cause the fruit to thicken.  My older children chide me for my apparently constant instruction to “scrape the bottom.”

Scrape we must to keep the sugars of high heat bubbling fruit from sticking and burning in seconds.  For jam is easily burned, easily spoiled in huge batches with even a speck of burned flavor.  Though pectin makes cuts the second full boil to a mere ten minutes, it’s advisable to use an apron and heavy sleeves or mitts to keep from being burned by splatters of boiling sugary fruit.  The canning process is good hard work, not for the faint.

Here’s how to take your fresh fruit of almost any kind to preservation.

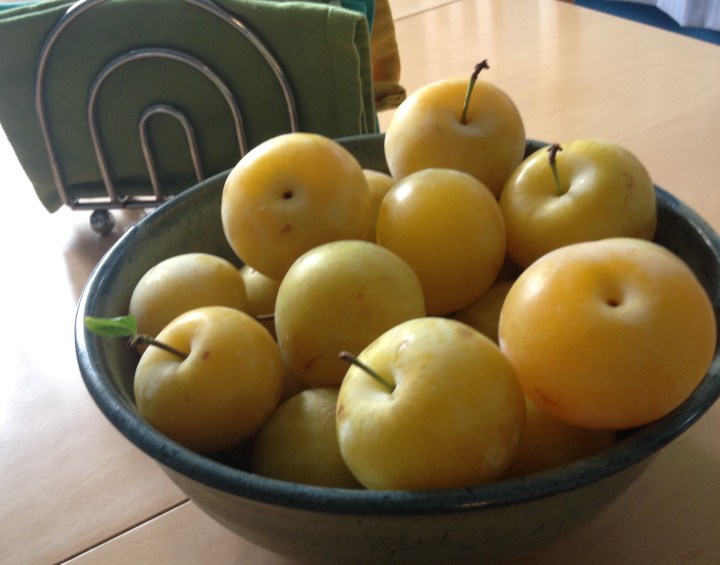
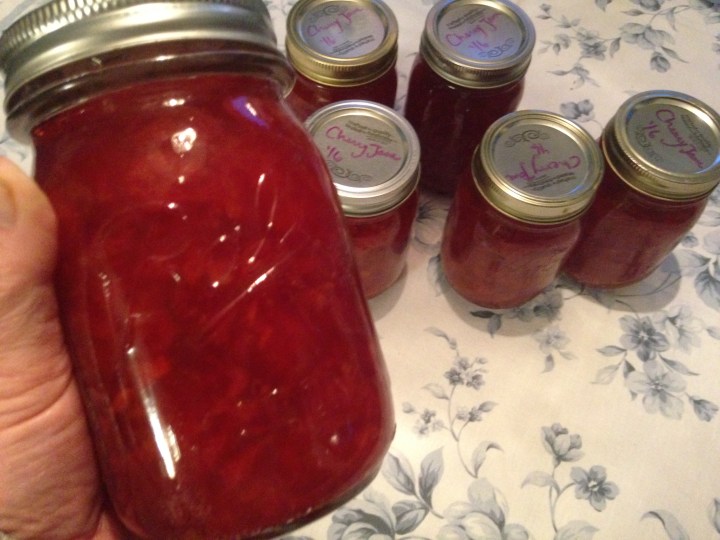
~Plum Jam Double Recipe~

13 cups chopped ripe plums

9 cups sugar

2 packages powdered pectin

1 T butter, to reduce froth when boiling

7-8 pint jars, new lids and bands

Yield: about 7 pints (plus a little jar for immediate tasting)


~Set out and have ready: funnel, jar lifter, large spoon, cloth to set hot jars, clean cloth for wiping jar rims.

~Rinse plums; pit and chop , measure and place in a large sauce pot.

~Fill canning pot and place all jars inside, setting burner on high to boil; this sanitizes, heats them for jam and gets your water going.

~Measure sugar into large bowl and set aside.

~In a small bowl, place lids and bands, ready to pour boiling water over to soak.

~Add pectin and butter to plums and combine; turn on high heat and be ready to constantly stir.

~While stirring and checking mixture, remove hot jars to a towel and pour boiling water over lids and bands.

~Bring fruit mixture to a full rolling boil (a boil that does not lessen when stirring) while stirring and scraping bottom of pot; stir in all sugar.

~Return to a full rolling boil, careful not to get splattered, using oven mitts or large lid to shield yourself; boil for timed 7 full minutes, again constantly stirring and scraping bottom; then test lifting the spoon to check if fruit is congealing.

~Remove jam from heat and immediately pour into prepared hot jars using funnel; leave 1/4 inch headspace.

~Using a clean cloth dipped in the boiling water bath, wipe rims of each jar (even a speck of fruit unseen on the rim can compromise sealing); secure lids with bands finger tight.

~Place pints in boiling water canner for 10 minutes; remove back to towel and tighten bands when cooled enough to touch.

~Let stand until sealed, or without movement for at least 12 hours.

Love from our kitchen to yours!  Gina @ Soul & Stomach

comments 3

Indian Lentil Dinner: with Sweet Spices, Beef & Apples

IMG_4138

Little lemon tree, happy and producing.

Indian curried lentils warm my soul and stomach.

This recipe, just right for the season and written for large quantity, hails from my college days before having apples of my own and a little lemon tree to pick.  These fruits are complimented well by sweet coriander and cardamom, cinnamon and turmeric in a coconut base.

Filling and healthy, this fall meal provides us all aspects of nourishment.  Spiced lentils will delight your senses, with savory onion and garlic to round out tender beef and subtle lentils with a zest of fresh lemon.

The recipe is designed for a crock pot but can easily be made in smaller proportion on the stove top, covered, or in a standard dutch oven.

IMG_4141

Coriander, cardamom, cinnamon and turmeric warm and brighten.

~Recipe~

Indian Lentil Dinner

3 c raw lentils (any type will do, I used red this time) and 5 cups water to cook

6 T coconut oil

1-2 lbs beef (I used round steak, but most any cut will do)

4-5 cloves garlic, minced

2 cups onion, chopped

2 t salt

pepper to taste

1 t turmeric

1 t cinnamon

1 t coriander

1/2 t cardamom

1 lemon

2 c apple, chopped

salt to taste

~Place lentils in crock pot, add 3 T coconut oil and water; cover and turn on high.

~Cut beef in 1 inch pieces; quick fry on medium high heat in 3 T coconut oil, but do not cook through; add onion and garlic and cook briefly; remove and add to lentils.

~Grind spices along with salt and pepper with mortar and pestle and add to lentils along with juice from one lemon.

~Cook 1-2 hours or until tender; add apple and cook a few minutes until tender; salt to taste.

~Cook rice of choice and serve lentil curry over rice or separately, and enjoy!

Love from our kitchen to yours!  Gina @ Soul & Stomach

IMG_4142

comment 1

Just Juice It

Just in case society crumbles, the pantry is packing.

Worried about warding off winter scurvy?  An easy fix ~ juice and can all the freshness of fall.

IMG_4076

After the more lengthy work of sauces, salsas, chutneys and such, processing remaining fruits in the juicer is a super simple plan.  Juicing with a three segment steamer saps all the softer fruits into sealed jars for winter with little effort.

We use yellow and purple plums, apricots, peaches, grapes and cherries, all pictured here for perusal.  Grapes off the vine are perhaps best of all, breaking down fastest and sweetest, needing no sugar added for the canning process.  Our grapes are pink and white varieties so the juice cans a pretty pastel pink.

The astoundingly easy part of this canning recipe is that no water bath boil is needed!  Juicing fruit into hot jars and capping with seals and bands is slick and simple organic goodness.

IMG_4081

Grape Juice Recipe ~ Canned

Ingredients/supplies:

Grapes, plentiful, at least a box full (or any soft fruit or combination)

5 quart canning jars, lids and bands

Steamer

~Pack the top of the steamer to the brim with fruit, fill the bottom with water and turn on high to boil.

~Set quart jars on a baking sheet in oven below the range on 190 degrees.

~Set timer to 30 minutes to check middle segment for filling.

~When middle segment is full of juice, open oven and pull out rack with jars still on baking sheet (this is to catch spills of burning hot juice); open hose and fill to 1/2 inch from top of jar; seal with lids and bands and place aside to cool and seal.

~First filling will probably fill two quarts; Reset timer for 20 minutes and repeat.

Total yield is usually 5 quarts.

Love from our pantry to yours!  ~Gina @ Soul & Stomach

IMG_4079

comments 4

Max Batch Salsa: Canning

Harvest time ~ busy and abundant are the key words of these weeks.  The canner and dehydrator fill up every day.  Trees and gardens overflow as the days grow shorter.  The sun’s giving us the hard working energy we need for high gear preservation of fresh fruits and vegetables.  And the joy that comes with harvest inspires the work of cooking, freezing and preserving.

IMG_0861

Harvest can be overwhelming when all the produce seems to be ready at once.  Planning food production and preservation at summer’s outset is an asset now when timing is key to putting up all that’s been grown and gathered.  Utilizing all you have, wasting naught, tis the goal.  

DSCF4143

Tomatoes must be used fresh—refrigeration saps their complex sweet flavor.  Herbs can be brought inside and potted for winter or hung dry and then crumbled and jarred.  Root veggies and hard fruits are stored easily.  But as tomatoes are top priority, we often start here.  And after making dozens of different salsa recipes through the years, I know this is a useful canner, which I offer as solid and adaptable. 

Tomato Salsa for Canning, Max Batch

Tomatoes, about 5 gallons, diced

Onions, about 6-7 diced

Garlic, about 20 cloves, or large 2 heads, diced

Vinegar, 1 1/2 c white wine or cider

Peppers, spicy: jalepenos recommended, about 10 diced

Peppers, sweet: bells, pablanos or banana peppers, 5-6 diced

Salt, 2 T plus to taste

Cilantro, 1-2 bunches fresh chopped (equalling 1-2 cups) stems and all                                                                                               

This recipe is designed for a double batch of salsa in a 20 quart roaster, designed to fill the water canner  twice.  Cut the recipe in half for one batch made in an 8 quart sauce pot which will yield 7 quarts of salsa to fill the canner once. 

As usual, be sure all lids, bands and jars are washed and hot, sitting in boiled water water when ready to process.

For best, fresh flavor, combine all ingredients in a 20 quart roaster or large sauce pot and bring barely to a simmer; do not simmer longer.  This will retain the chunky salsa and not thin it out. No worries about flavors combining—they will in the canning process and in the pantry with the slight pickling process that occurs with vinegar based salsa.

Fill hot jars to 1/2 to 1 inch of head space from top and close with hot, new seals and bands.

Process in a boiling water canner: quarts for 25 minutes, pints for 15 minutes.

Remove and let stand 12 hours, checking seal before putting up in pantry.

DSCF4187

Sustainable Tips:

Hopefully your garlic is plentiful and punchy for this recipe.  I find the spice of garlic to be one of the most important flavors in good salsa.  Planting garlic in the fall, be sure get it in before the ground freezes, covering with staw for extra insulation.

Cilantro is easy to grow in a kitchen herb garden or outside.  It grows very quickly, and can be reseeded regularly.  Cilantro is entirely useful, roots, stems, seeds, leaves and all!  The seed is a super sweet one called coriander very common to East Asian curries and pastes.  It is good to have on hand for grinding and adding to dry rubs or for reseeding when your cilantro greens get low.

Love from our kitchen to yours ~Gina @ SoulandStomach

DSCF4268

comment 0

Canning as Spiritual Practice

Why do the mundane and repetitive work of canning food?  What are the reasons that make it anything more than a hobby?

In our high velocity American culture that values speedy profit at the expense of quality and continuity, we increasingly hear complaints about food.  The vast majority of foods consumed in our country are unnatural ~ drenched in preservatives and other consumer pleasing chemicals, genetically modified, and highly processed from their original form.  Factory farming is quite rightly under attack by thinking people, and there’s been a movement towards ‘organic’ consumption for those who can afford it.  For people with open eyes and willingness to research their culture’s food, there have come shouts and demands for companies to be responsible and honest, even whole movements attempting to take down GMO giants.  Simply put, food has become highly political and much of it is no longer real food.

DSCF4273

Of course, this information isn’t new.  Having researched all these issues in the early ’90s, I made it a goal before having children to produce and preserve my own food to the fullest degree possible.  Reaching that goal doesn’t come easily.  The methods of growing and preserving aren’t obviously or readily available, and that is a major reason for this blog I write.  It’s definitely a learning curve, and the pantry becomes more packed with canning each year as I gain knowledge and efficiency.  T

he best information, as all veteran canners know, comes through heritage and word of mouth ~ what that back-to-lander mama showed us years ago, what grandma used to do in the kitchen.  Again, this is the very reason for writing Soul & Stomach.

Rather than shout and rant about the wrongness of companies and their chemical food production, my response is this: grow it, gather it, can it, cook it ~ myself.

IMG_0224

It is quite true that ‘buying organic’ is a great economic barrier for the majority of American families.  But it is even more true that if one’s mind is concentrated on growing and gathering without cost, it is a tangible reality.

I made a decision over a decade ago that whatever I was to preserve or can would be procured without payment, through growing my own, barter, good will or good finds.  And just by that force of decision, there hasn’t been a dollar spent.

DSCF2865

Here’s how: make it known to neighbors and friends that you want to preserve food and you’ll give them a sample of your work, offer what you can in barter for fruits and vegetables you can’t manage yourself, look for wild fruit trees on public land, find out who is at the end of their harvests with more than they can handle to process, cultivate good will, and above all, grow your own!

Preserving food is labor intensive, there is no way around it.  But here is the main point of that work: it is fundamentally good and joyful.

Say you have 10 gallons of apricots.  You can count on methodically washing, pitting, and sorting them for a good deal of a morning.  You may want to juice them, make jam or nectar so that all their nutrients are preserved for the dead cold of winter ~ it will take you all day.

But as you work, you find that your fingers become more nimble, more efficient, and your mind focuses on the beauty of your activity.  Suddenly you realize it is meditative, fingers and thoughts having found a rhythm.  What seemed mundane and repetitive has become peaceful, comforting, actually desirable and above all, natural.  You find yourself thinking about how you might procure more fruit for the next project.

IMG_2040

When done, the satisfaction with the work that fills your heart is not an empty pride but rather a wholesome fullness that matches the fullness of God’s creation of these beautiful fruits made to nourish your family and sustain your life.  The tiredness you feel is similar to the sweet muscle aches after climbing a mountain.  You know without a doubt that this work was meant to be, was done by many mothers before you, and it is good work.

It is all this and more that makes canning as necessary and worthy now as it has ever been.  Good food should feed the spirit as well as the body, and this is what makes canning a spiritual practice.

Love from our kitchen pantry to yours, Gina @ Soul & Stomach

NOTE: On Soul & Stomach you will find recipes and methods for all the canned goods you see in this article, applesauce, salsas, jams, juices, nectars, marinara, chutneys, and more to come.  Check the Recipe Index for these.

IMG_0095

comments 4

Cherry Chocolate Oat Muffins

Cherries have dripped from their trees in a wonderful year of harvest.  Bings, Rainiers and sour varieties have filled our baskets and pails, processed and preserved in many ways.  Here’s a final method for the last of them with sweet, dried Bing cherries for snacking and baking.  IMG_2086IMG_2078
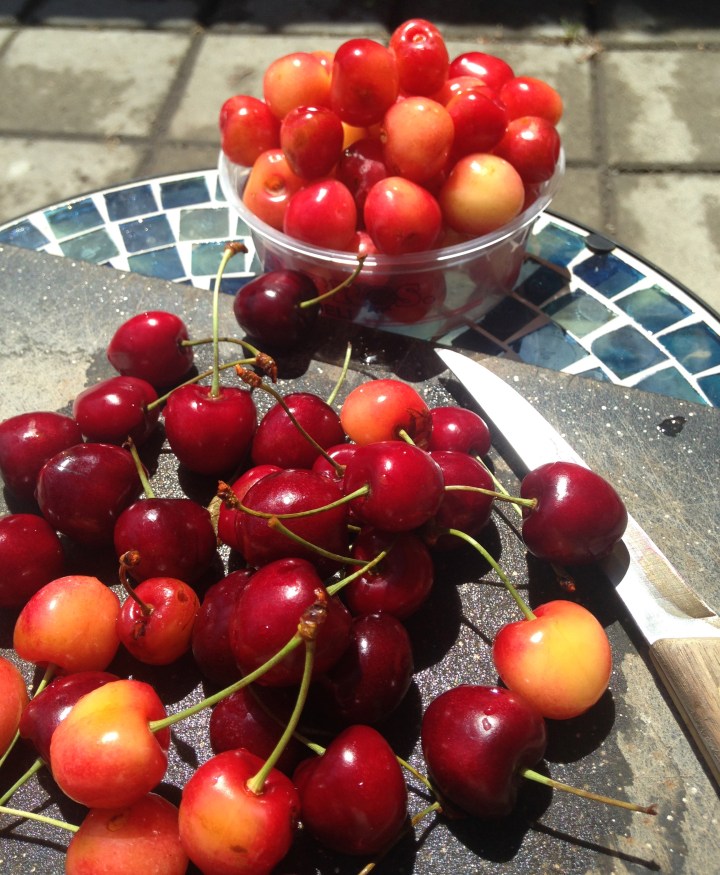
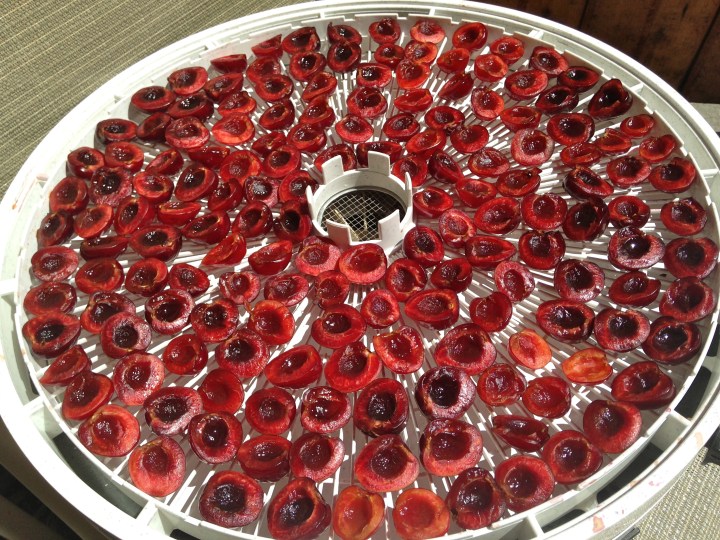
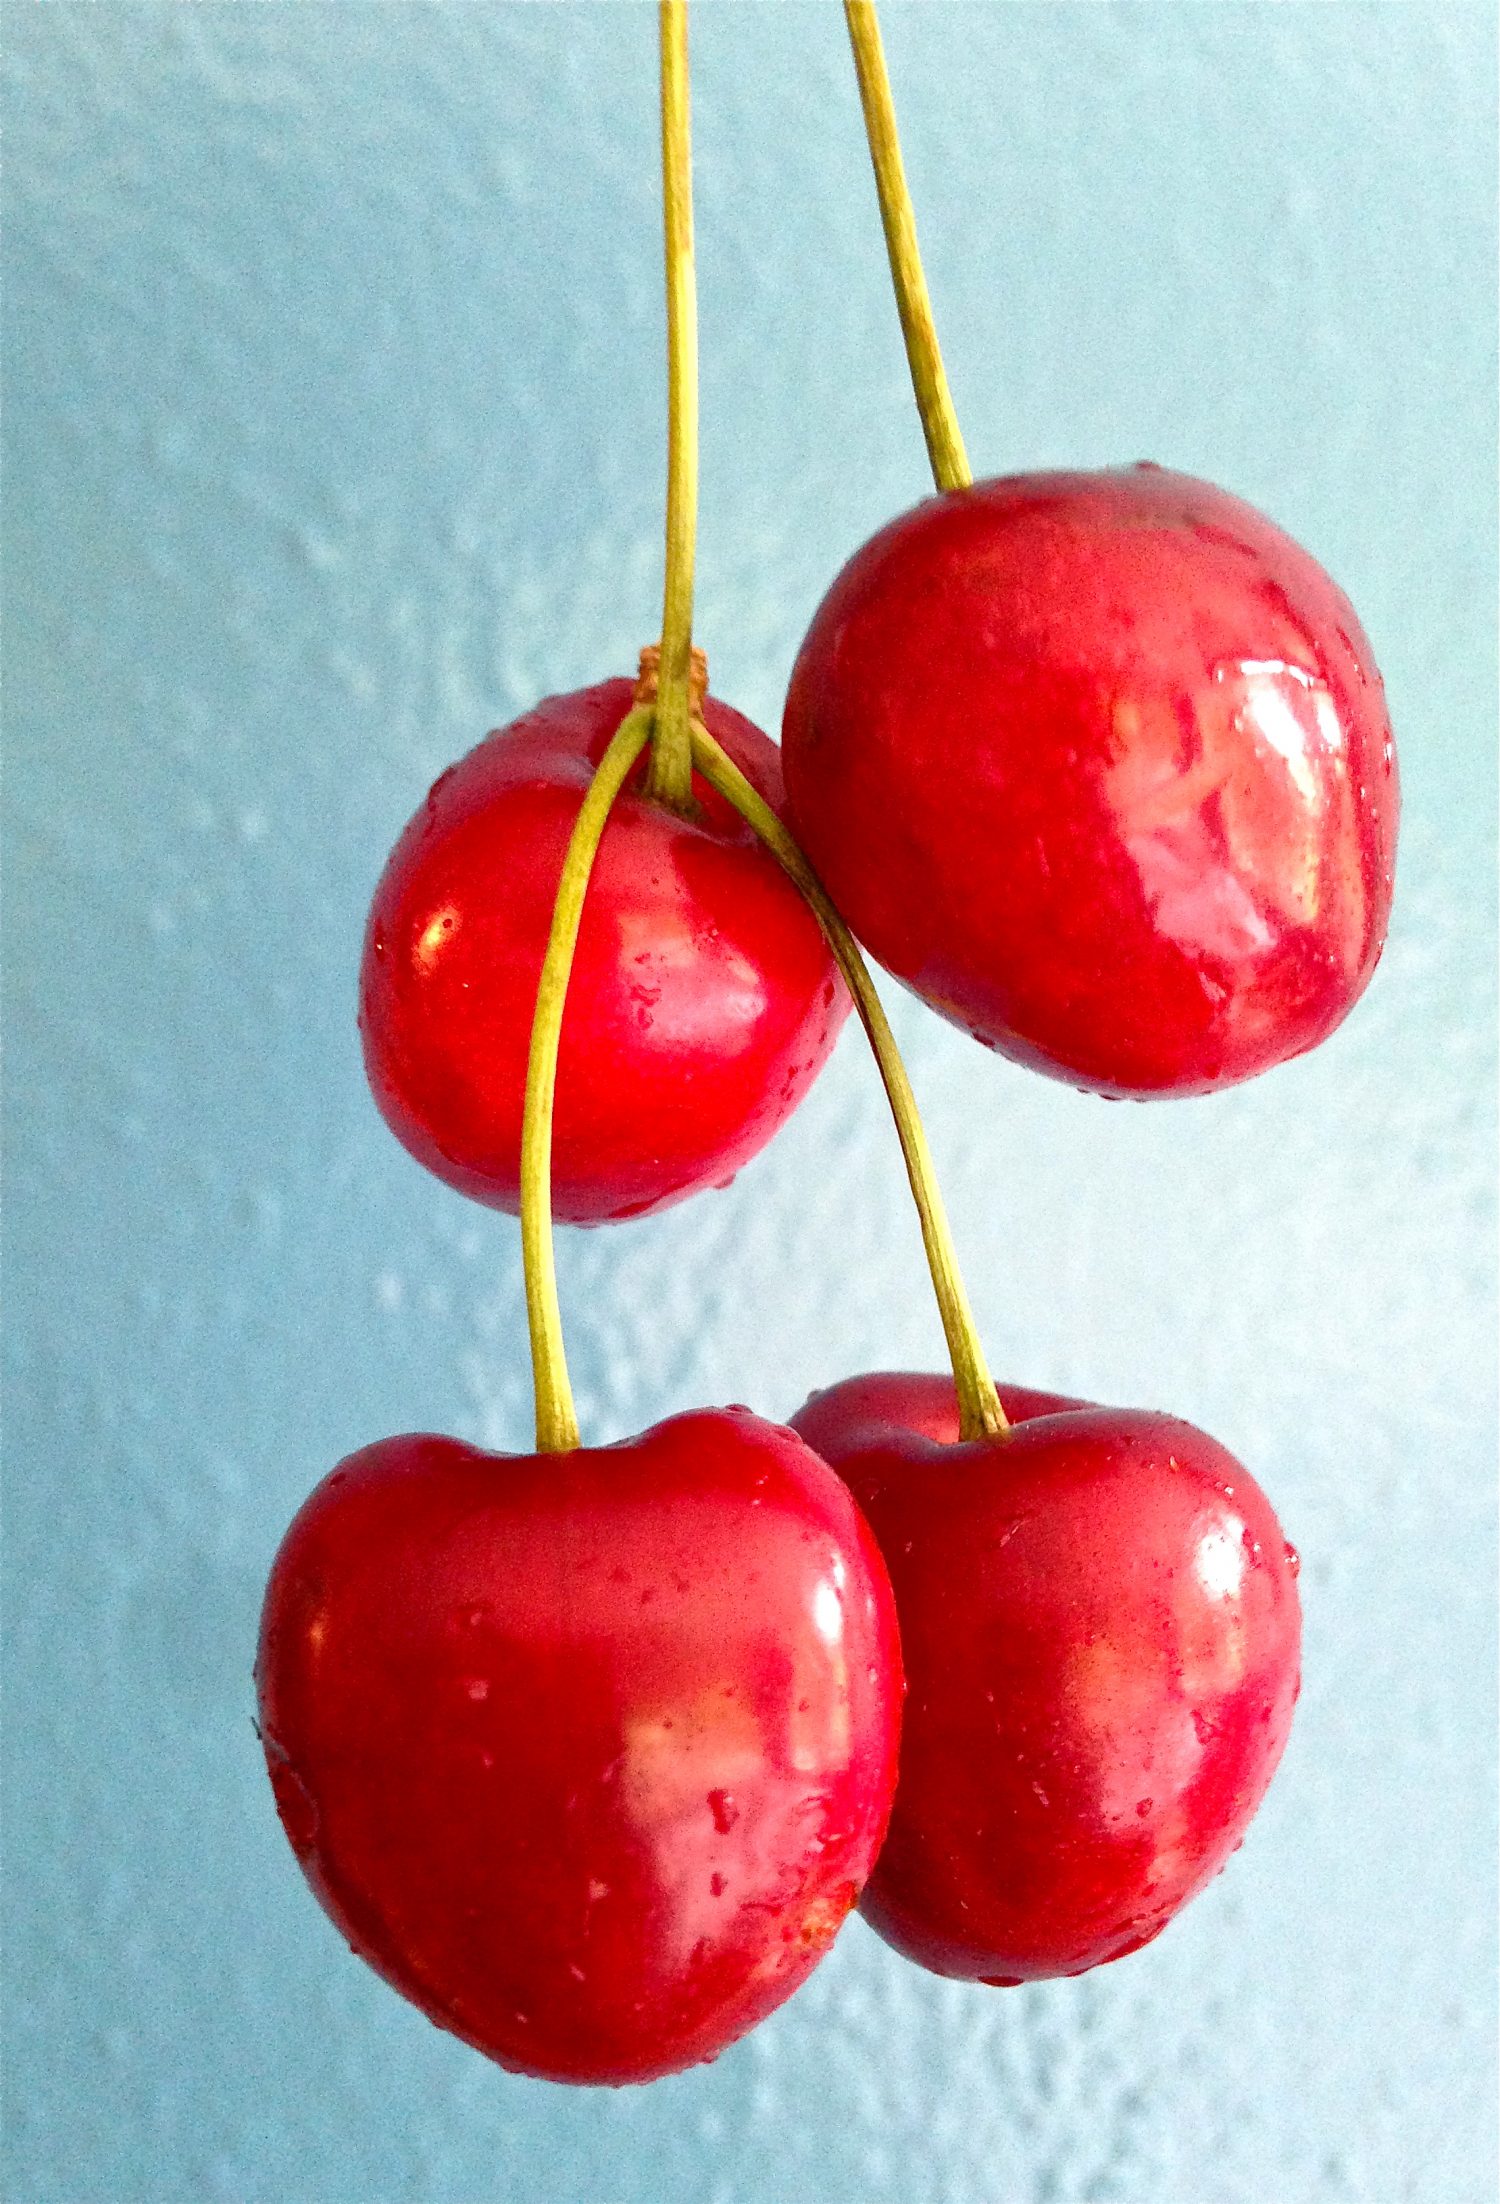
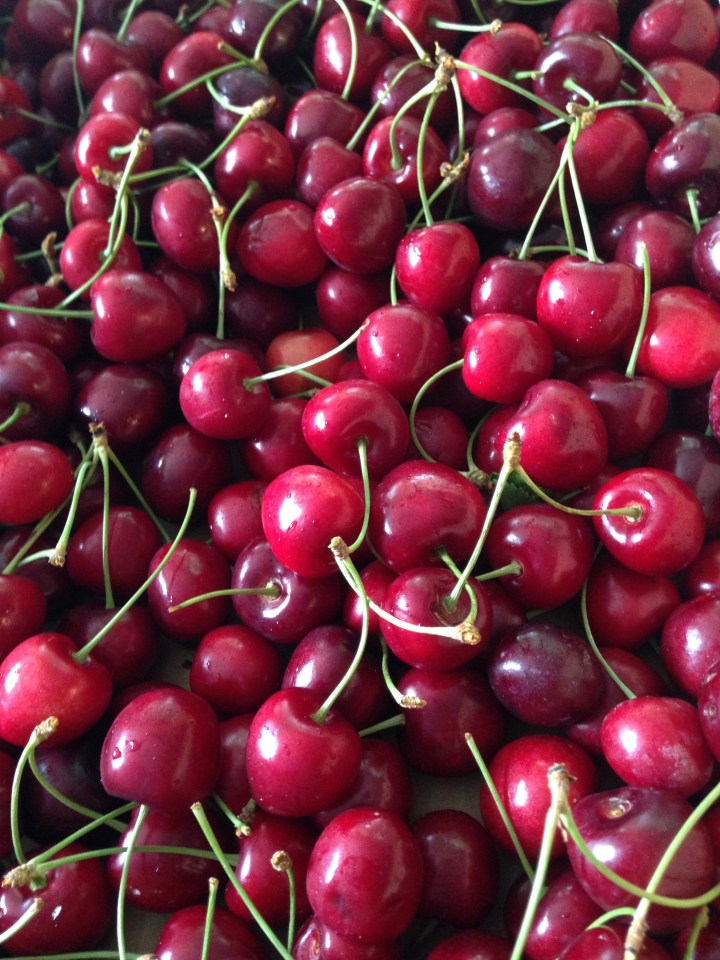
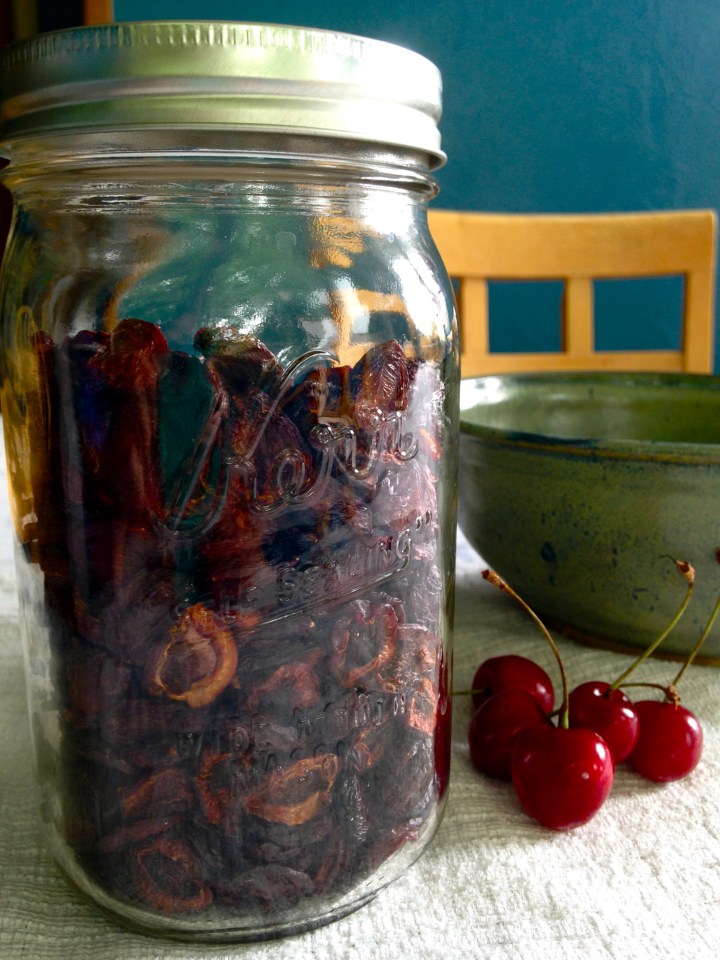
Dehydrating cherries saves their sweetness and intense flavor and is a fairly quick process.  Successful processing has included halving, pitting and placing skin down on the rack, dehydrating according to timing and temperature of your device.

Dried cherries and chocolate combine with heart healthy oats making these nutritious muffins taste like a treat.  For breakfast or snacking, this is a simple, speedy recipe.  Easy to double up, we often make a large batch of oat base muffins and freeze for breakfasts to come.  They taste great pulled out of the freezer and thawed at room temperature overnight in a sealed container.  Or a 30 second reheat in the microwave makes moisture return for a bit more enjoyment.

We’ve made different variations of oat muffins, combining leftover chunky cranberry sauce and white chocolate chips ~ awesomeness ~ or sugared chunks of rhubarb.  These are winners worth testing as well.

IMG_1424

~Cherry Chocolate Oat Muffins~

3/4 c oats

1 1/3 c flour

1/3 c sugar

1/4 t salt

2 t baking powder

1 egg

1 c milk

1/4 c vegetable oil

1 c semi sweet chocolate chips

1 c dried cherries, coarsely chopped

granulated sugar for topping

Yield: 12 muffins

~Preheat oven to 400 degrees F; grease or line 12 muffin cups.

~Combine all dry ingredients, make a well in center and set aside.

~Combine egg, milk and oil in a separate bowl and mix well; add to dry ingredients and stir to combine.

~Fold in chocolate and cherries.

~Fill muffin cups to 3/4 full and bake for approximately 18-20 minutes or until knife inserted comes out clean.

~Remove from muffin tin and cool on a wire rack; eat fresh or store sealed at room temperature or freeze.

Love from our kitchen to yours, Georgina @ Soul & Stomach

IMG_1432


comments 4

Sour Cherry Jam

It’s like a bit of cherry pie in every bite.  Jam on toast has never tasted closer to the well loved desert.  And this canning jam is easy as pie, even for the novice canner.

Unlike the sweeter varieties, sour cherries are a breeze to pit.  So preparing this jam is a matter of a little gouge with the finger and a pop of the pit, a course chop, and the recipe is on its way.

IMG_2044

We enjoyed using this jam in some experimental mini pies with leftover dough from a real-deal cherry pie.  It worked well for a quick sweet treat.

IMG_2054

IMG_2057

As with all canning processes, set out all supplies ahead of cooking.  Use fruit that is fully ripe for proper acidity level, and discard any fruit that is marred by insects or significantly browned.

This recipe and method is a double batch, which has been made multiple times with good results.  Often, jam recipes call for not doubling, and this is true because boiling times change based on amounts processed.  So, the key to success in this double batch, designed to efficiently fill a standard seven space canning pot, is to follow the recipe and timing exactly.

IMG_2040

~Sour Cherry Jam~

8 c sour cherries, pitted and chopped

9 1/2 c sugar

2 packages pectin

1 T butter

7 pint jars, new lids and bands

Yield: 7 pints (plus a little extra for immediate tasting)

~Set out and have ready: funnel, jar lifter, large spoon, cloth to set hot jars, clean cloth for wiping jar rims.

~Rinse cherries; pit and chop cherries, measure and place in a large sauce pot.

~Fill canning pot and place all jars inside, setting burner on high to boil; this sanitizes, heats them for jam and gets your water going.

~Measure sugar into large bowl and set aside.

~In a small bowl, place lids and bands, ready to pour boiling water over to soak.

~Add pectin and butter to cherries and combine; turn on high heat and be ready to constantly stir.

~While stirring and checking mixture, remove hot jars to a towel and pour boiling water over lids and bands.

~Bring cherry mixture to a full rolling boil (a boil that does not lessen when stirring) while stirring and scraping bottom of pot; stir in all sugar.

~Return to a full rolling boil, careful not to get splattered, using oven mitt or large lid to shield yourself; boil for timed 3 full minutes, again constantly stirring and scraping bottom.

~Remove jam from heat and immediately pour into prepared hot jars using funnel; leave 1/4 in headspace.

~Using a clean cloth dipped in the boiling water bath, wipe rims of each jar (even a speck of fruit unseen on the rim can compromise sealing); secure lids with bands finger tight.

~Place pints in boiling water canner for 10 minutes; remove back to towel and tighten bands when cooled enough to touch.

~Let stand without movement for at least 12 hours.

~Love from our kitchen to yours!  Gina@ Soul & Stomach~


comment 0

Bing Cherry Chicken Marinade

This is the first of three recipes utilizing the year’s bounty of cherry goodness.

The spring came early, spared us frosts that devastated last year’s harvest, and blessed us with abundance.  Now is the time to preserve, bake and cook up the cherries.

IMG_2072

This recipe recommends itself as simple and flavorful, using a substantial ammount of cherries.  The method written is for a slow cooker, however, it would work just as well to marinade the chicken chilled for 2 plus hours and then grill.

IMG_2077

~Bing Cherry Chicken Marinade~

1/2 c honey

2 c pitted and finely chopped bing cherries

2 T balsamic vinegar

1/2 c onion, finely chopped

6 cloves garlic, finely chopped

1/4 c lemon juice

1 t thyme, crushed

1 t salt

1/4 t black pepper

6-8 pieces chicken on the bone

Yeild: about 6 servings

~Pit and chop cherries; chop onion and garlic.

~Combine well with all ingredients in a small bowl.

~Place chicken in slow cooker; pour marinade over chicken and set on low for 4 hours.

~Serve over rice or with vegetables.

~Love from our table to yours! Gina @ Soul & Stomach~


comment 0

Classic Chuck Roast with Herb & Wine Deglaze

The savory winter roast ~ can you be topped?  According to the teenage boys who shoveled out our snow socked driveway, there is no beating this recipe.

Of course there are many versions and methods of the chuck roast, but this recipe received its honing from years of many experiments and further consultation with Thomson’s Custom Meats.  Praise to the local butcher and ranchers providing us with all natural, home bred beef of finest quality and cut for this amazing, winter entree.

IMG_1412

In the meat shop this week the conversation centered on chuck roast methodology, with butcher Chris Thomson confirming the method herein.  Searing until almost burnt allows the meat to hold it’s moisture and reach maximum tenderness while wine brings out the natural flavors in the beef, providing just enough sweetness to compliment savory herbs.  The deglaze, often left out of recipes I find, is a must for bringing out the best of your slow roast.

IMG_1414

In the deep winter months, this rich, balanced meal rightly uses available roots left in the pantry, and gives us the adequate energy to keep on shoveling.

Thank you to Chris and Diana Thomson at Thomsons Custom Meats for only the best, locally bred, https://www.facebook.com/Thomsons-Custom-Meats-213625848678720/.

Classic Chuck Roast Recipe

~Crock Pot method recommended but a Dutch Oven also works

1 beef chuck roast, 2 1/2-3 lb.

2 T olive oil

salt and pepper

2 large onions, halved then sliced in 1/2 in. wedges

6 cloves garlic, halved

5 good sized potatoes, pealed and sliced in 2 in. pieces

1 1/2 c carrots, baby or chopped

3/4 c red wine

2 c beef broth, hot

1/2 t additional salt

herbs: 2 T total crushed, dried oregano and marjoram, 2 pinches of thyme or 4-5 sprigs of fresh thyme

Note: if using dried herbs, sprinkle liberally on roast as it sears; if using fresh herbs, add to slow cooker along with vegetables; both are recommended.  

~Prepare vegetables by cleaning and chopping and set aside; prepare hot broth, add wine and salt and set aside.

~Heat olive oil in cast iron skillet; pat roast dry and cover liberally with salt, pepper and herbs if using dried varieties.

~Sear roast until almost burnt on both sides and edges; remove roast from cast iron to slow cooker and set on low.

~Add all vegetables to slow cooker, nestling garlic atop and within the roast and root vegetables around edges and atop.

~Deglaze skillet with broth combo, scraping all bits from edges and pour over roast.

~Add fresh herbs if desired.

~Cook on low for 5 hours; turn to warm until serving.

Yield: 8 servings

Stay warm and enjoy!

~Love from our table to yours, Georgina @ Soul & Stomach~

IMG_0391

comments 4

Saucing the Whole Tomato

The tomato is truly one of the finest edible creations. And the succulence of the garden ripe heirlooms we’ve been picking urges using every little bit of the fruit.

IMG_0861

Finding a way to use seeds, skins and all is always the preference in terms of nutrition content.  Peel or seed a tomato, and some of the best nutrients are thrown away.   It takes a good recipe to accomplish the goal of wasting naught.  From this year’s garden harvest we’ve done everything from sun dried, to salsas to many marinaras for plentiful sauce throughout winter.

DSCF4143

There are many methods for marinara sauce, and in the past there were many hours spent peeling, seeding and cooking that marinara base down until it reduces by half, watching, monitoring, stirring and waiting for thickness.  But, no more.  With this recipe, marinara production time is cut in half with an easy, slow roast oven method that turns out delicious every time.

DSCF4226

It seems that the reasons for this sauce’s success lie in 1) the use of the entire fruit and 2) a slight caramelizing of the tomatoes on low temperature that lends the roasty flavor, reduces excess moisture and preserves the fresh tomato taste.

DSCF4231~Roast combo complete and ready to blend~

Oven Roasted Marinara Recipe

5 lb tomatoes

10 good sized cloves garlic

bunch of fresh basil

extra virgin olive oil

salt and pepper

Note: The ratios of this recipe are designed for two standard sized baking sheets.

~ Preheat oven for 225 degrees; wash and drain tomatoes; remove stems and any large imperfections.

~ Cut tomatoes in 1/2 inch slices and lay flat, skin sides down, packing tightly on parchment lined baking trays.

~ Place whole cloves garlic atop tomatoes; drizzle olive oil over all and sprinkle liberally with salt and pepper.

~ Bake for 2 hours, and remove from oven to cool.

~ Blend with fresh basil  in a blender or food processor until smooth.

~ Serve and enjoy fresh, or store by freezing or boiling water canner for 25 minutes at full boil.

Yield: about 2 quarts

DSCF4172
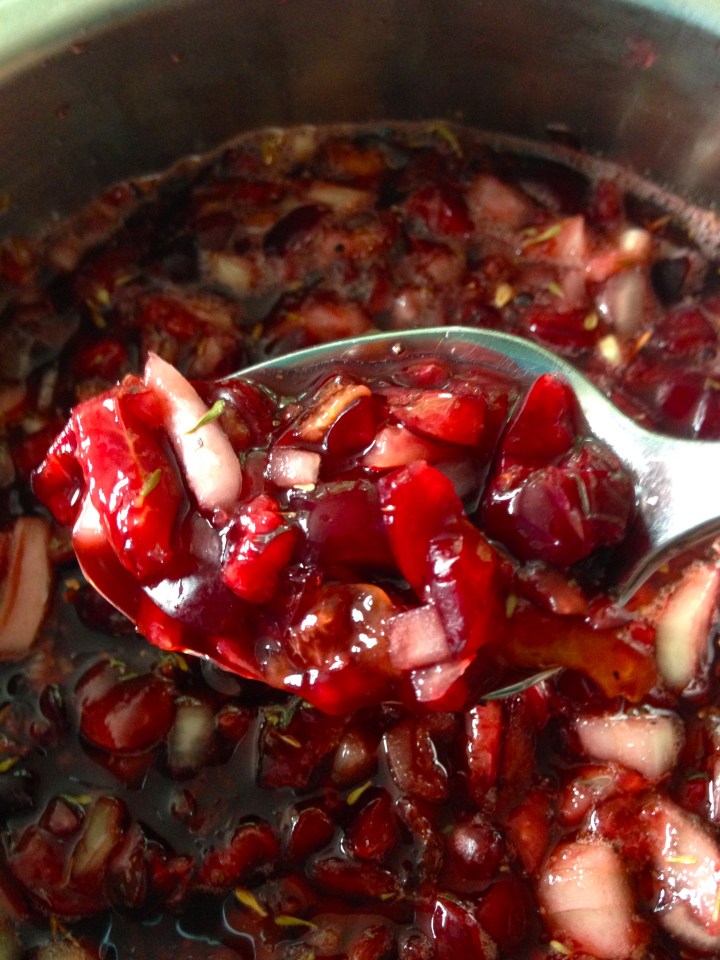
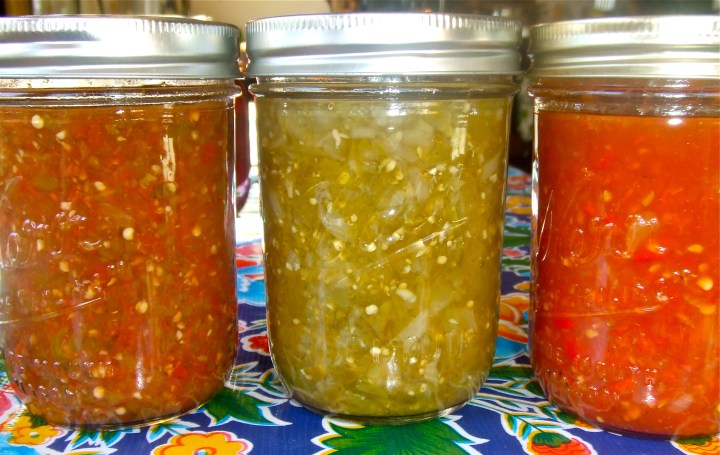
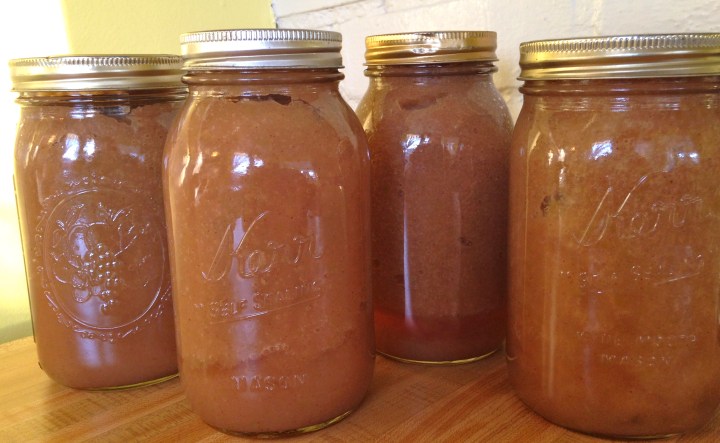
~Sauce with a serious thickness~

Love from our garden kitchen to yours! Georgina @ Soul & Stomach